

In my last post about secure access to XenDesktop virtual workspaces I tried to give an overview of the different ways to implement multi-factor authentication with Citrix NetScaler and XenDesktop. I came to the conclusion that integrating the remote access with Azure AD and using the Microsoft MFA feature is a very end user friendly way to accomplish this goal, especially when you already have Azure AD in your setup. In this post I will outline a walkthrough to the setup and configuration steps needed.
Settings and Configuration in Microsoft Azure AD
In a first step we need to create a new enterprise application in Azure Active Directory.
- Log in to your Azure management portal (portal.azure.com) and go to the Azure Active Directory
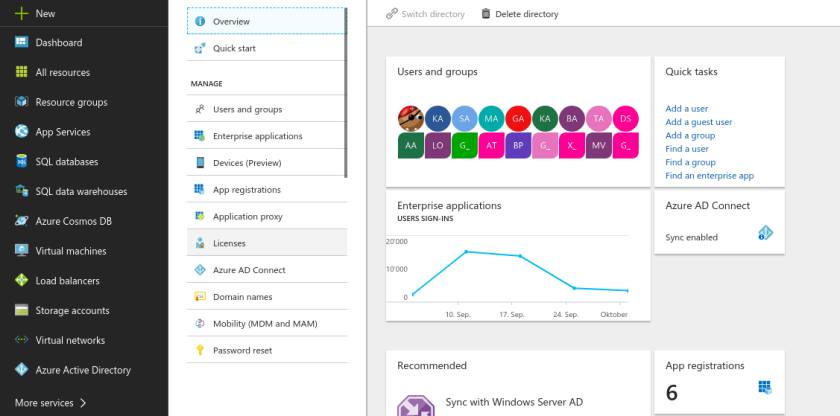
Select the Azure Active Directory management - Select Enterprise applications and create a new application. Choose to create a non-gallery application and give it a name

Add a new Non-gallery application 
Name your application – This is the name of the application your users will see on their access panel - After your enterprise application has successfully been created, you will see the Quick start panel.
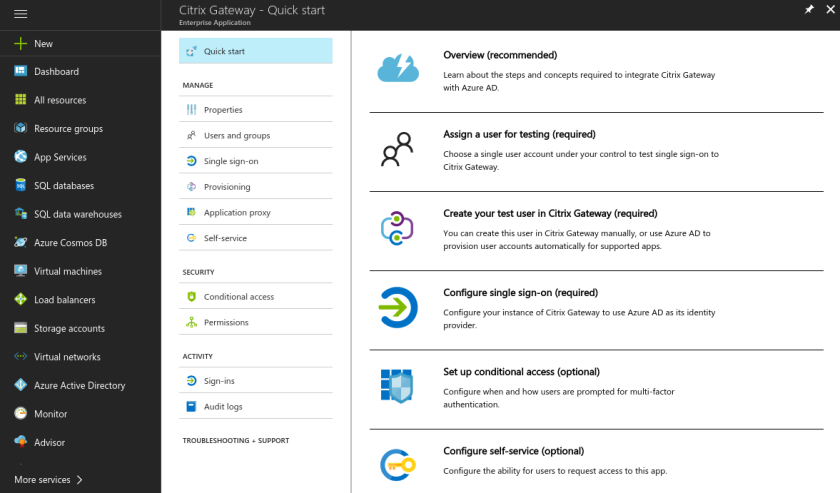
Quick start pane of the new enterprise application - In the properties of the enterprise app you may change the name of the application and assign a custom logo. Here you also can globally enable or disable the application and choose if a user assignment is required for the application. If this option is set to yes, users must first be assigned to this application before being able to access it. If this option is set to no, then any users who navigate to the application will be granted access.

Enterprise application properties - Add users and groups you want to grant access to the application

Assign users and groups to your application 
Assign users and groups 
Assigned user to the enterprise application - Move on to the Single sign-on settings and enable SAML-based sign-on
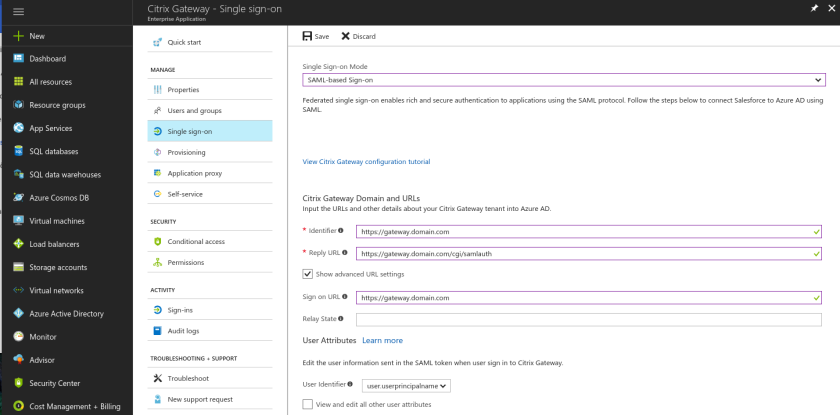
Enable SAML-based Sign-on - Set the Identifier to the URL of your NetScaler gateway
- Set the Reply URL to the URL of your NetScaler gateway and append /cgi/samlauth
- Set the Sign on URL to your NetScaler gateway address
- Select user.userprincipalname for the User Identifier
- Make the new certificate active and set a notification email. When the active signing certificate approaches its expiration date, notifications are sent to this email address with instructions on how to update the certificate.
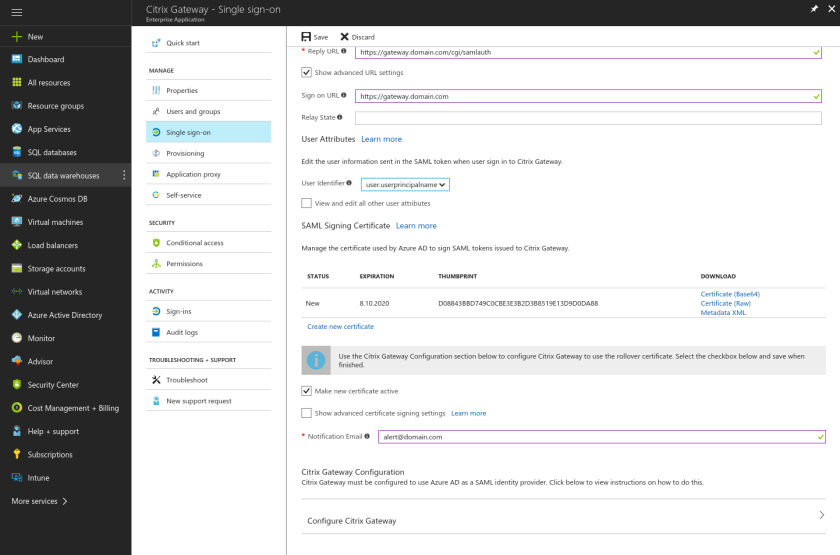
Make new certificate active and set a notification email - Download the SAML signing certificate (Base64). We need this later on our NetScaler to set up the SAML authentication.
Citrix NetScaler Configuration
The configuration on the NetScaler side is quite straight forward. We just need to edit an existing virtual gateway to reflect our new SAML authentication against Azure AD.
- Upload and install the SAML signing certificate to your NetScaler’s CA certificates. This can be done under Traffic Management -> SSL -> Certificates -> CA Certificates.
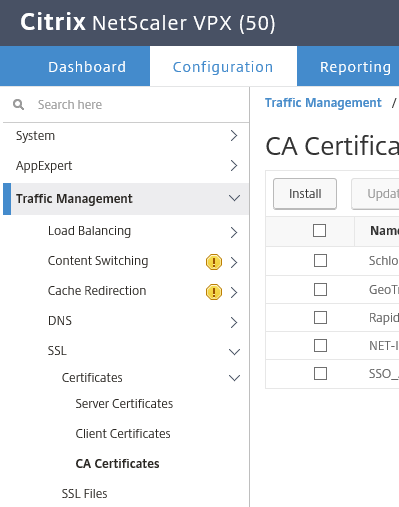
Upload SAML signing certificate 
Install SAML signing certificate - Add the SAML authentication server via Authentication -> Dashboard
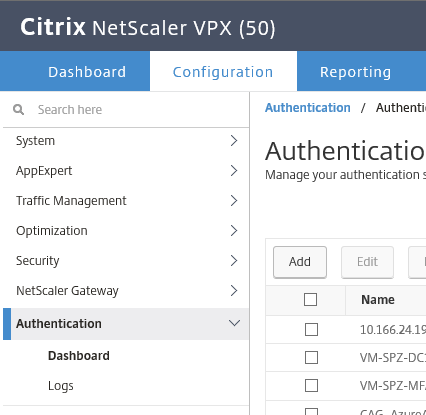
Add SAML authentication server - Choose SAML for the server type and select the uploaded IDP certificate. For the signing certificate you may select your NetScaler server certificate. The Issuer Name has to match the Identifier you have set in your Azure enterprise app.

Configure authentication server - Now you need to provide the Redirect URL and the Single Logout URL, which you can lookup in your enterprise app on Azure AD (Configure Citrix Gateway at the bottom of the page).

Lookup redirect and single logout URLs 
SAML Single Sign-On Service URL and Sign-Out URL - Take note of the SAML Single Sign-On Service URL (Redirect URL) and the Sign-Out URL (Single Logout URL) and put the values in your authentication server configuration of the NetScaler.
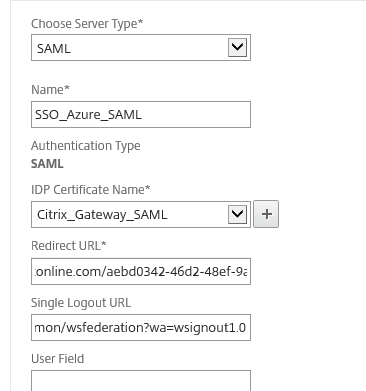
Set Redirect and Single Logout URLs - As a last step before hitting create, set the Signature Algorithm and Digest Method to SHA256.
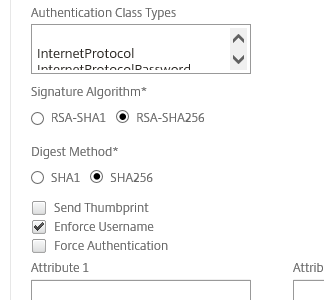
Set SHA256 - Head over to your existing NetScaler Gateway Virtual Server configuration. Remove existing Active Directory authentication policies under Basic Authentication and replace them by creating a new SAML Policy for the Primary Authentication.

Edit Basic Authentication to SAML 
Bind SAML policy - Make sure to remove the Single Sign-on Domain from the Session Profile bound to the virtual server
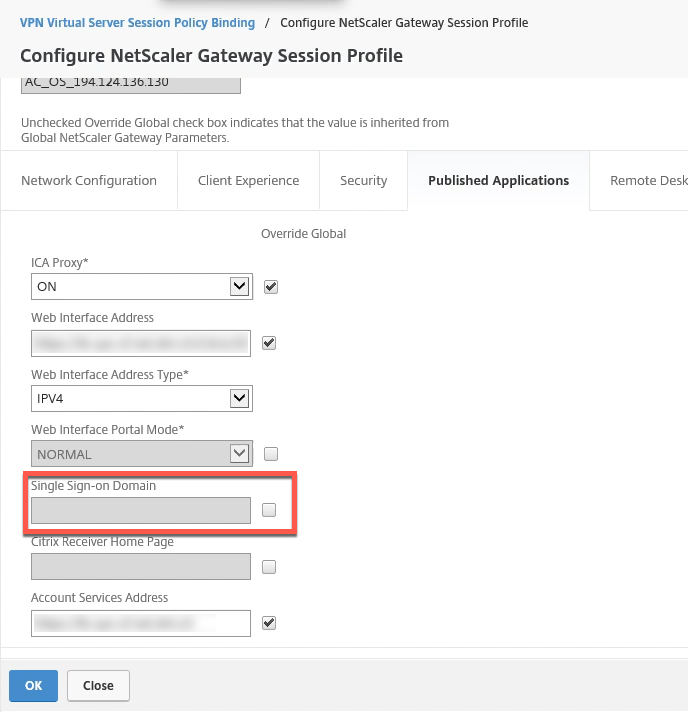
Remove Single Sign-on Domain from Session Profile
Installation and setup of Citrix Federated Authentication Service
The next step is to implement Citrix Federated Authentication Service in your Citrix XenDesktop / XenApp environment. Without Citrix FAS your NetScaler SAML authentication will work, but your users would have to re-authenticate when starting desktops and apps from StoreFront, which is definitively not what you want since we aim to build a true Singe Sign-On solution for our users.
There is a great blog posts from awesome Citrix CTP Carl Stalhood on how to set up Citrix Federated Authentication Service. You find his detailed setup guide under http://www.carlstalhood.com/citrix-federated-authentication-service-saml/. It’s a very straight forward process and I encourage you to follow his guide for the setup.
Citrix StoreFront Configuration
In a last step we need to enable Federated Authentication on your StoreFront servers and fully delegate credential validation to NetScaler Gateway. Enable Federated Authentication Service integration on StoreFront by running the following PowerShell commands:
Get-Module "Citrix.StoreFront.*" -ListAvailable | Import-Module
$StoreVirtualPath = "/Citrix/Store"
replace with your corresponding Store name!
$store = Get-STFStoreService -VirtualPath $StoreVirtualPath
$auth = Get-STFAuthenticationService -StoreService $store
Set-STFClaimsFactoryNames -AuthenticationService $auth -ClaimsFactoryName "FASClaimsFactory"
Set-STFStoreLaunchOptions -StoreService $store -VdaLogonDataProvider "FASLogonDataProvider"
To delegate the credential validation to NetScaler Gateway, in the StoreFront management console go to Manage Authentication Methods of your Store, and select the settings of Pass-through from NetScaler Gateway, where you can enable Delegated Authentication.

Enabling and configuring Azure MFA for your Citrix Gateway enterprise app
That’s it, you are almost done! The very last step is to enable and configure multi-factor authentication for your newly created Azure enterprise app.
- Create a new Conditional Access Policy
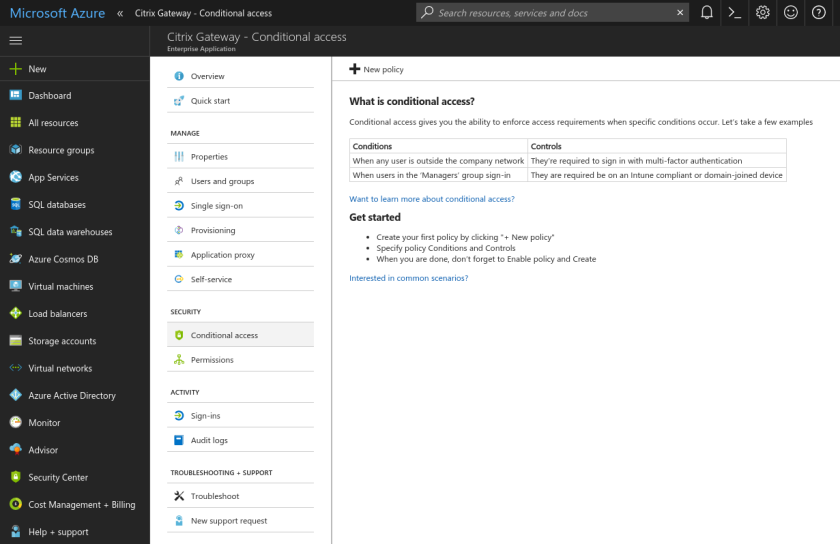
Create a new conditional access policy - Specify the users and groups to be included and / or excluded from the policy
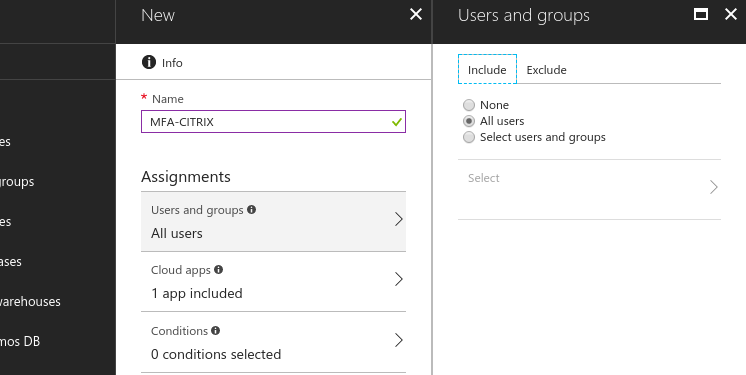
Users and groups in the directory that the policy applies to - Set the conditions which define when the policy will apply. You can specify conditions based on
- Device platforms (Android, iOS, Windows Phone, Windows, macOS)

Platform the user is signing in from - Location (determined using IP address range the user is signing in from)
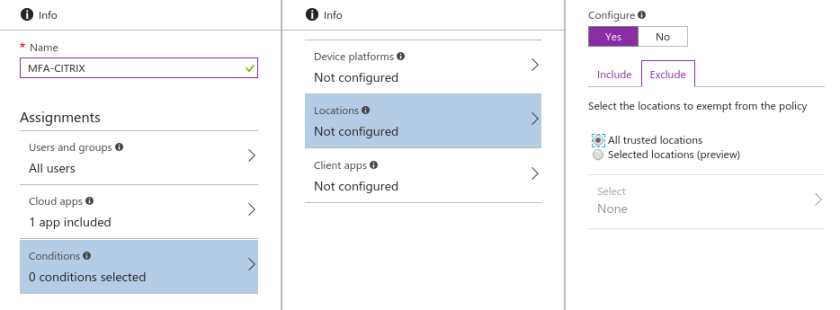
Location the user is signing in from
- Device platforms (Android, iOS, Windows Phone, Windows, macOS)
- Set Access Controls to block access or enforce additional requirements which need to be satisfied to allow access. You can enforce the following additional requirements
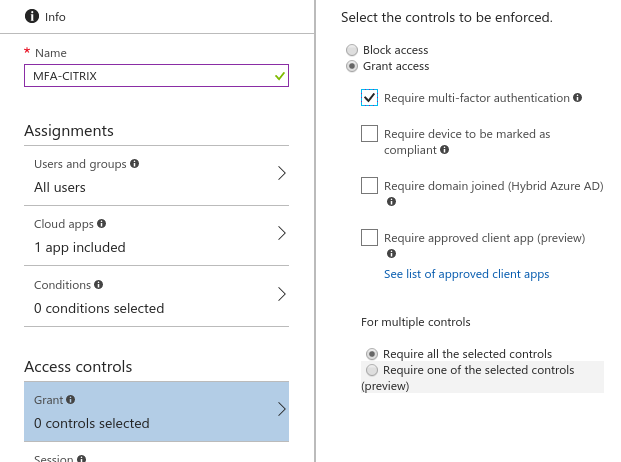
Select the controls to be enforced - Require multi-factor authentication – User must complete additional security requirements like phone call, text, authentication app challenge
- Require device to be marked as compliant – Device must be Intune compliant. If the device is non-compliant, the user will be prompted to bring the device under compliance
- Require domain joined (Hybrid Azure AD) – Devices must be Hybrid Azure AD joined
- Enable the Conditional Access Policy
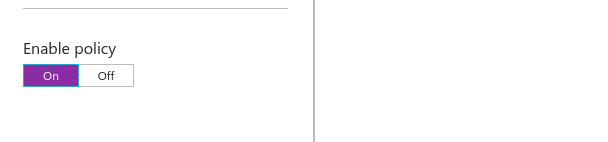
Enable the Conditional Access Policy
Finally all done and you have implemented a highly user friendly way to provide your end-users with a secure remote access to your company’s Citrix XenDesktop / XenApp environment.
See it in action in the following video clip and enjoy the outcome of your hard work!

Hoi Rene
What about password changes? We’re using that scenario and don’t see the “change password” option when logging in to Receiver for Web within a browser. Citrix says it’s only supported when NOT using a NS – and I can see the change option when connecting directly to the Storefront address internally.
Any ideas?
Thanks
Udo
LikeLike
Hi Udo,
As discussed on Twitter with enabled password writeback from Azure AD to the on-prem AD the users are given to change their passwords trough the corresponding Azure feature. After a change the new password is written back to the local active directory. The feature has to be enabled on the Azure AD Connectors (see https://docs.microsoft.com/en-us/azure/active-directory/active-directory-passwords-writeback).
The built in Citrix feature to change passwords as described in https://support.citrix.com/article/CTX219939 will not work in a SAML setup, because there is no password exchange between the SAML IdP (Azure) and the SP (NetScaler). Hope this helps.
LikeLike
Hi Rene,
Thanks for the steps above.
I have a quick question for you as I am currently configuring this, when I tried to create the SAML Authentication Server, after clicking on Create I got an error message:
Arguments cannot both be specified [samlIdPCertName, metadataUrl]
Do you have any idea of what could be the issue?
Thanks
Arnaud
LikeLiked by 1 person
As discussed offline this seems to be a GUI issue with the latest NS release. For reference: http://arnaudpain.com/2018/08/02/netscaler-latest-firmware-gui-bug-with-saml-configuration/
LikeLiked by 1 person
great post. can the Netscaler then be integrated into the App toolbar within O365?
LikeLike
Hi Dave, thanks for the comment! Yes it can – see https://docs.microsoft.com/en-us/azure/active-directory/active-directory-saas-custom-apps
LikeLike
Great post! When I get to the Netscaler part–mine doesn’t look the same. Its missing some fields? We have a vpx 1000. Anyone ever seen this?
LikeLiked by 1 person
What are you missing Katie?
LikeLike
Hi Rene,
Kudos for a great post – I haven’t tried it yet, but will be shortly.
I’m looking at a Production VPX 200 that has the SAML option listed in the drop down, but on a test unit (VPX 50) it is not visible – so I’m guessing it might be a limitation of the license? That might also be Katie’s issue?
So if I can’t test using the Test environment then I’m sort of stuck?
But from what I can tell looking at the existing Prod unit it should be benign to *ADD* another Authentication policy that points to a Test AD Domain/Tenancy to validate the SAML Authentication stream – yes?
Thanks in advance,
Dave C
LikeLike
Hi David, thank you for the kudos! I don‘t think this is a licensing issue, I am pretty sure it also should work on a VPX 50. What build version do you use? Since the writing of my post the GUI has changed a bit in later NetScaler releases and 12.1 also has some bugs in the GUI. Were you able to create an authentication server and just can’t the SAML policy on your vServer or is the SAML option missing when creating a new Authentication Server? You could try with an older build or create the Authentication Server via CLI, maybe this helps?
LikeLike
At this stage I’m just doing some prelim discovery to validate how to glue Azure MFA service (not the OnPrem Server) to the existing Citrix system. This is all based on ver 12.0 Build 53.22, in the smaller Test VPX 50 the SAML & SAML IdP options are missing completely (in fact it’s only LDAP, RADIUS and not much more…) but in the Prod VPX 200 it has a lot more options to choose from including WebAuth, TACAS, Cert, OAuth, Negotiate, etc…
The Customer has raised a Support ticket with Citrix to check things out.
I was told the Licensing on the Test instance might be a cut down version with limited capabilities – but not sure if that’s real or imagined 😉
Can you confirm that it should be reasonably benign (or possible at least) to add a SAML Authentication config (pointing to a different AD Domain) without upsetting the existing LDAP Authentication configs?
LikeLike
Just setting up just the Authentication Server will not have any impact as long as you don’t bind the SAML policy to your existing vServer configuration.
LikeLiked by 1 person
Hi Rene,
Great blog post, any idea how to get the Netscaler SLO (https://netscaler_fqdn/cgi/tmlogout) into the Azure App single sign on settings? Psh or import of Metadata file? Testing SLO only logs the user out of AzureAD and not the SP
LikeLike
Hi Stig, as far as I know this is a limitation of Netscaler at the moment. See https://support.citrix.com/article/CTX230620
LikeLike
There is a GUI bug in Citrix Netscaler / Gateway 12.1 – SAML option not abailable when creating a new authentication server. See Wilco van Bragt‘s article http://virtualization.vanbragt.net/articles/general-articles/citrix-federated-authentication-service-fas-tips-and-tricks
LikeLike
Hi Rene, Thanks for sharing these instructions. I deployed an Azure AD SAML solution based on these. I am using NetScaler 12.1.48.13. In this build of NetScaler, you can provide just the App Federation Metadata URL from Azure AD, instead of Redirect URL and the Single Logout URL (Step 5 in ‘Citrix NetScaler Configuration’). Could you update the article for the same.
Thanks again and keep up the good work.
LikeLike
Hi Ashwin, thanks for the info about the Metadata – good to know!
LikeLike
Will I be able to implement this using “Citrix ADC VPX 200 – Standard Edition”, or do I need to upgrade to Advanced?
Thanks Rene!
LikeLike
Hi Robert, this should work with the standard Edition.
LikeLike
we’re having the issue at the moment where we have users using MFA to login to citrix via the web, however we may have some users that we need to set to not use MFA.. when we used the on prem MFA server we had a setting that allowed a fallback method.. so we could add users to disabled and they could still use username and password to login.. when using purely AzureAD MFA we do not have the option, if we disable MFA the user simply is unable to login.. i hope this makes sense.. without the fallback option we’re stuck with how to do this.. conditional access doesnt seem to have an option to bypass and just use uname and pword.
LikeLike
Hi James, you can include/exclude users or user groups from conditional access policies. By doing so it’s possible to have MFA required only for certain users. You find this settings under Assignments in your conditional access policy bound to your enterprise app. Hope this helps.
LikeLike
I tried this with our Netscaler but after authenticated in Azure I get the error: AADSTS700016: Application with identifier “https://xxxxx.domain.com” was not found in the directory ‘1357ourTendantID5c9’. Can not find any mistake on the Azure config.
LikeLike
Great post!! When trying to upload the Azure saml signing cert into the netscaler it’s asking for a key file name as well. I cannot get past this. Any help is appreciated. NS 12.1.49
LikeLike
Thx! Sorry for my late answer. There was a GUI issue with NS 12.1 – installation of the signing certificate through CLI should work.
LikeLike
Thank you so much for the detailed tutorial, it helped me a lot during the implementation. I finished all the steps, I get the screen that requests Email address and password, then I get prompted to MFA, once approved I get redirected to a page requiring the Windows credentials!! Even when I provide the windows credentials, I am not able to login!! Any hint please? The GPO is in place and applied to the StoreFront server, FAS Server and all VDAs.
Thank you so much in advance.
LikeLike
Thanks for your feedback! So you don’t get redirected back to your Storefront? After enabling Storefront for FAS with the PS commands, did you delegate credential validation to Netscaler/ADC? See the step „Fully delegate credential validation to NetScaler Gateway“ in my blog article.
LikeLike
Thank you so much for your quick reply! Yes I did, in my case it was “Fully delegate credential validation to Citrix Gateway”. No I do not get redirected to the StoreFront, despite the fact that I run the PS commands successfully without any errors!
Any hint please? I do not see why it is not working
LikeLike